This post may contain affiliate links. Please read our disclosure policy.
This was my first time dry-brining a turkey and I don’t think I’ll ever look back. It’s so much easier than a traditional wet brine and quite possibly even more delicious. Here’s how to make my Dry-Brine Thanksgiving Turkey!
As we all know, Thanksgiving turkey can often get a bad rep. Flavorless, overcooked, dry…it can really go bad pretty quickly. Enter: dry-brining! This technique not only helps inject the turkey with flavor, but also helps it to stay super moist.
To do it, you’ll rub a salt and dry spice mixture all over the turkey, then let it sit for 24 to 48 hours in the fridge. As it rests, the salt helps to draw out the meat’s juices, then the salt dissolves into the juices, creating a brine without adding any liquid. From there, the brine soaks into the meat resulting into a flavorful, moist turkey.
There’s a few important things to keep in mind as you prep your bird. If you buy a frozen turkey, make sure you give it plenty of time to defrost. I’d allocate 3 to 4 days for your turkey to thaw in the fridge, depending on the size. Once your turkey is thawed, let it dry brine for 1 to 2 days before Thanksgiving. On Thanksgiving Day, remove it from the fridge for 1 to 2 hours prior to roasting so that it roasts more evenly and has a better chance at developing perfectly crispy skin, which everyone loves.
ingredients:
- Kosher Salt
- Fresh Sage
- Fresh Rosemary
- Fresh Thyme
- Garlic Cloves
- Freshly Ground Black Pepper
- Light Brown Sugar
- Cayenne Pepper
- Lemon Zest
- Turkey
- Low-Sodium Chicken Broth
- Unsalted Butter
step-by-step:
step one: make the dry rub
In a small mixing bowl, whisk together the salt, brown sugar, sage, rosemary, thyme, garlic, black pepper, cayenne pepper, and lemon zest.
step two: prep the turkey
Pat the turkey dry with paper towels. Arrange a roasting rack on a large sheet pan and place the turkey on top of the rack.
step three: dry brine the turkey
Rub the dry brine all over the turkey, especially on the breasts. Refrigerate, uncovered, for 24 to 48 hours.
step four: get ready to roast
Remove the turkey from the fridge to let stand for 1 hour at room temperature before roasting. Meanwhile, preheat the oven to 425°F.
step five: butter the turkey
Working from the neck end of the turkey, gently loosen the skin from breasts and rub the softened butter under skin of the bird. Tie the legs together with kitchen twine.
Fill a roasting pan with the broth and place the turkey and rack in the roasting pan. Transfer to the oven and roast until the skin starts to brown, about 20 minutes.
step six: roast the turkey
Reduce the oven temperature to 325°F and continue roasting, basting the turkey every 20 to 30 minutes with the broth/juices from the turkey.
When the turkey is starting to look golden brown all over, tent with foil. Continue to roast the turkey until an instant-read thermometer inserted into the thickest part of the thigh (without touching bone) registers 160°F. It will continue to cook once you remove it from the oven.
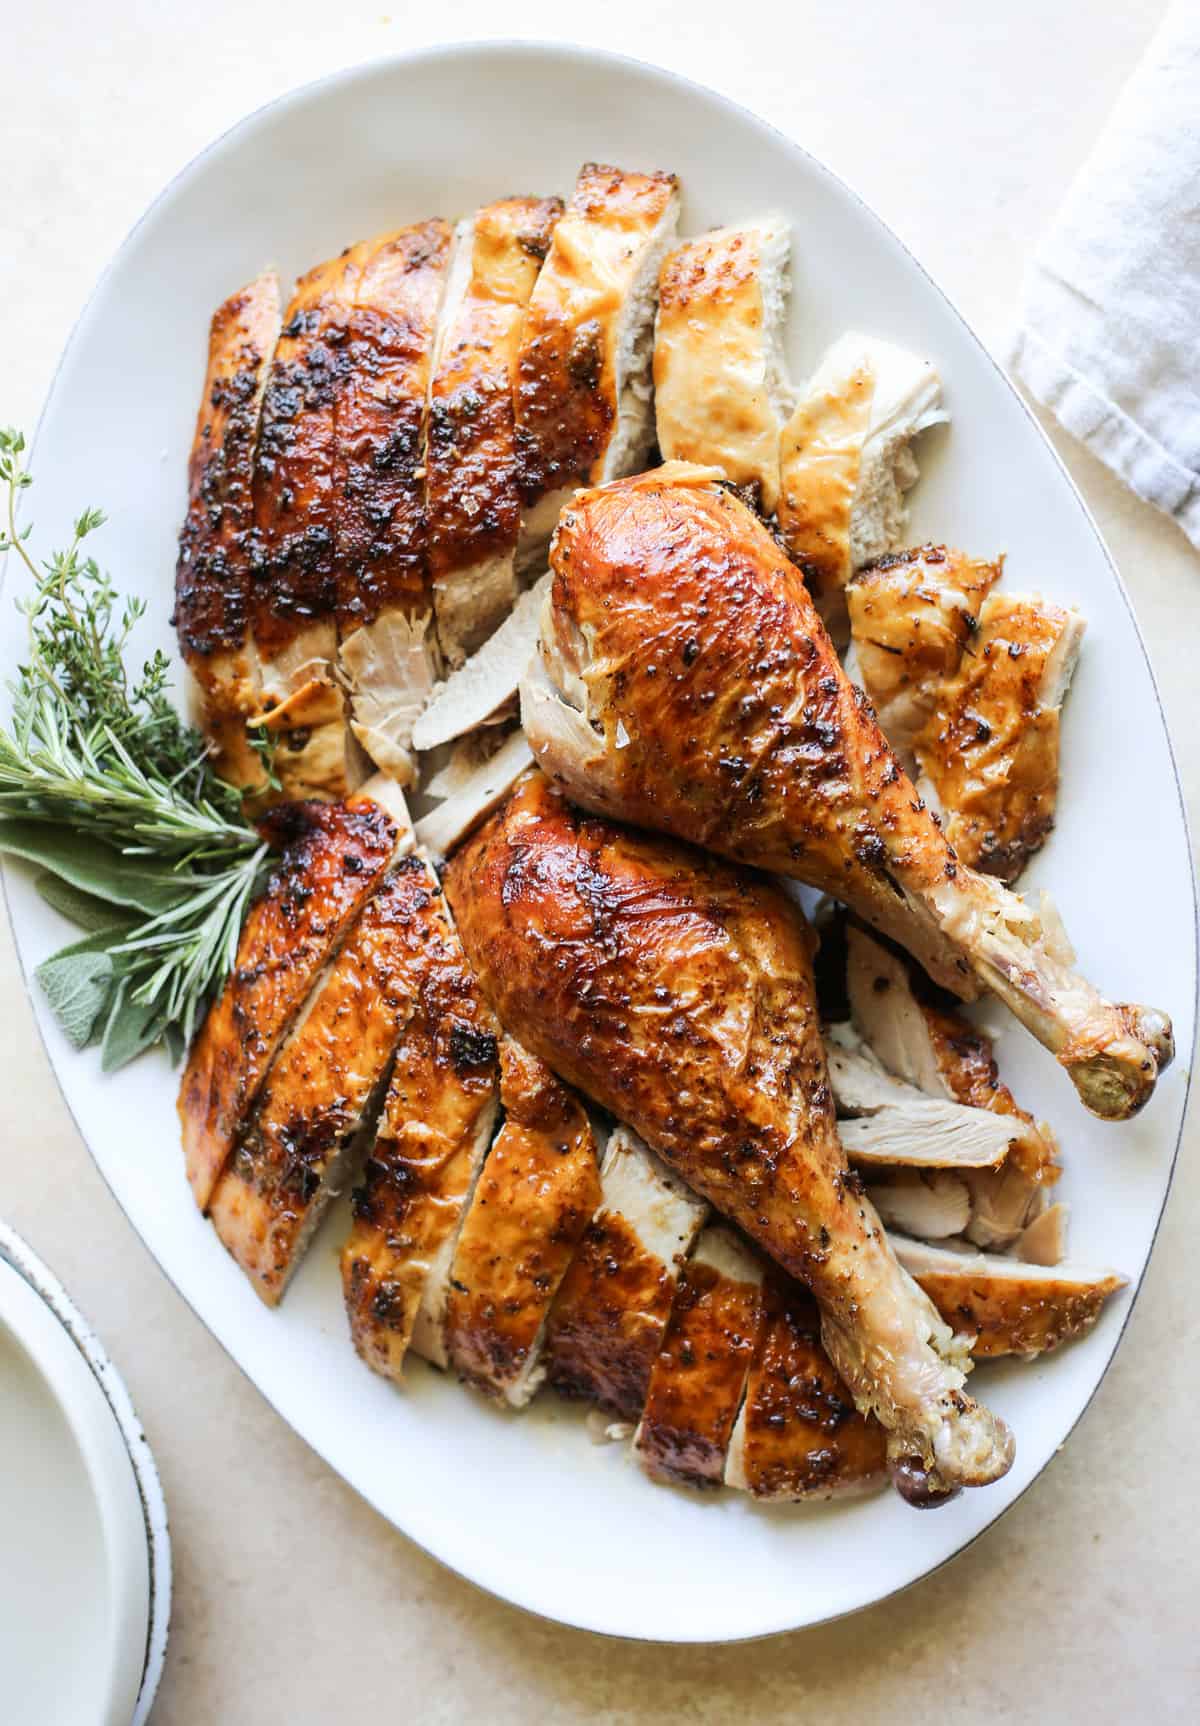
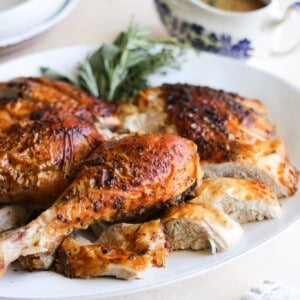
step seven: carve and serve
Let the turkey rest for 20 to 30 minutes before carving and reserve any pan juices for my Herby Turkey Gravy.
No! That’s the beauty of a dry brine. It’s way less messy than a wet brine. For a dry-brined turkey, you don’t need to rinse the brine off since it will retain great flavor as it roasts. Instead, simply brush off any excess salt before cooking.
You should account for about 1½ pounds per person, which will be enough to feed a crowd and offer leftovers. If you’re hosting 10 people, you’ll want to buy a turkey that is about 15 pounds.
Follow these tips and and you will have a perfectly cooked Dry-Brined Thanksgiving Turkey that you’ll want to make for years to come! Oh, and don’t forget to pair it with my Herby Turkey Gravy!
looking for more Thanksgiving recipes? try these!
Dry-Brine Thanksgiving Turkey
Ingredients
For the Dry Rub:
- 1/4 cup kosher salt
- 3 tablespoons light brown sugar
- 2 tablespoons minced fresh sage leaves
- 1 tablespoon minced fresh rosemary leaves
- 1 tablespoon minced fresh thyme leaves
- 4 garlic cloves, minced
- 2 teaspoons freshly ground black pepper
- ½ teaspoon cayenne pepper, optional
- 2 tablespoons lemon zest (from 2 small lemons)
For the Turkey:
- 1 (12- to 18-pound) turkey
- 2 cups low-sodium chicken broth, plus more as needed
- 6 tablespoons unsalted butter, softened
Instructions
- In a small mixing bowl, whisk together the salt, brown sugar, sage, rosemary, thyme, garlic, black pepper, cayenne pepper, and lemon zest.
- Pat the turkey dry with paper towels. Arrange a roasting rack on a large sheet pan and place the turkey on top of the rack.
- Rub the dry brine all over the turkey, especially on the breasts. Refrigerate, uncovered, for 24 to 48 hours.
- Remove the turkey from the fridge to let stand for 1 hour at room temperature before roasting. Meanwhile, preheat the oven to 425°F.
- Working from the neck end of the turkey, gently loosen the skin from breasts and rub the softened butter under skin of the bird. Tie the legs together with kitchen twine.Fill a roasting pan with the broth and place the turkey and rack in the roasting pan. Transfer to the oven and roast until the skin starts to brown, about 20 minutes.
- Reduce the oven temperature to 325°F and continue roasting, basting the turkey every 20 to 30 minutes with the broth/juices from the turkey.When the turkey is starting to look golden brown all over, tent with foil. Continue to roast the turkey until an instant-read thermometer inserted into the thickest part of the thigh (without touching bone) registers 160°F. It will continue to cook once you remove it from the oven.
- Let the turkey rest for 20 to 30 minutes before carving and reserve any pan juices for my Herby Turkey Gravy.
Notes
Nutrition
Nutrition information is automatically calculated, so should only be used as an approximation.


2021 Thanksgiving Turkey was a great success! I added more of the fresh herbs to the butter under the skin. And I added whole shallots to the pan which went right into the gravy! Easy and wonderfully moist, very flavorful!
YUM! First time using a dry brine and wow. Easy and delish!
woohoo!!
My turkey came out so juicy. This dry brine is so much easier than the wet brine I used to do. I will continue to use this recipe. Everyone really liked the turkey. Thank you
Hey! This is probably dumb but don’t want to screw up the turkey! 😅 I usually stuff with herbs and onions and things. Would this still be okay with recipe as is?
absolutely! stuff however you please!
Should I dry rub the inside of the turkey too or just the outside?
you can do the inside too, but the outside is most important.
Hey Alex!! I’ve got my turkey all rubbed down and in the fridge ! 🙂 I just realized I didn’t get any cooking twine (my fault for not reading the whole recipe before I shopped lol) ! Will the turkey be ruined if I don’t tie the legs up? Is there another method of securing the bird I can do? Or can I just let this bird ride it out untied? What do you recommend?
Hi Alex!
If I am not using a roasting pan with a rack, should I still add the broth to my pan?
If you have a pan that has sides– i would!
Should we wipe away the dry brine rub/ bits from the turkey after taking it out of the refrigerator before roasting or leave on?
I left my dry brine on the turkey– however, if any fell into the roasting pan– i’d rinse that out first.
I made this for friendsgiving, and everyone was SHOCKED at how moist and delicious it was. I’ve cooked Turkey many different ways with the same dry result but this actually turned out TASTY and MOIST!!
yay!! Thanks so much, Stephanie!
Hello. Excited to try the dry brine for the first time! Question, do I need to rinse the turkey before roasting as you do when it’s a liquid brine? Thanks!
some people do rinse off their dry brines (you totally can!!), I didn’t and it turned out great